简介
没啥好说的,这个东西做iOS的都认识。
前段时间,把自已的一些库给弄出来,做一个私有库,记下来当作笔记。
正文
先看看下面这个图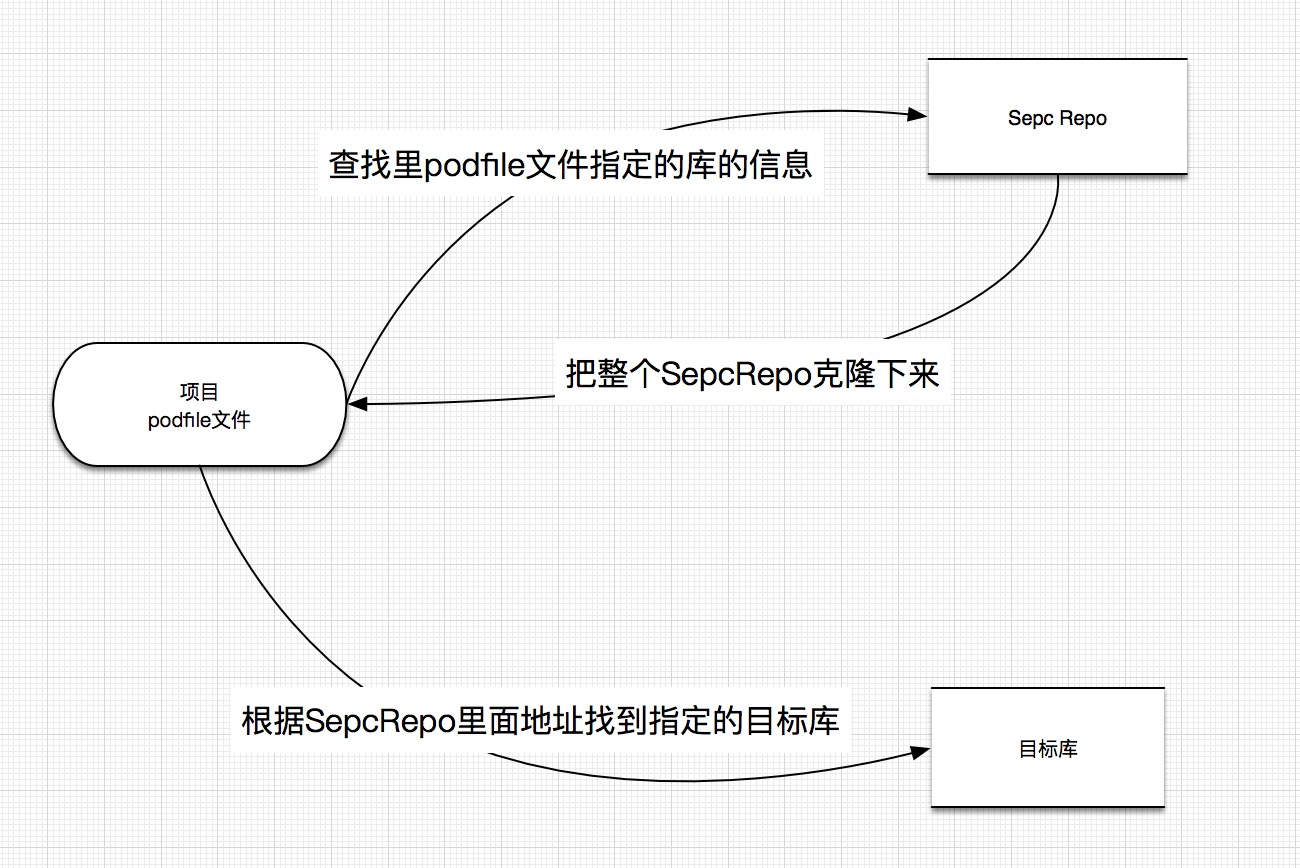
SpecsRepo 是什么
它是一个索引库,里面在包含了很多个库的索引(有很多的podspec)文件。
打开mac笔记本就可以看到 ~/.cocoapods/repos/master就是官方库的一个索引。里面的文件夹结构如下面
1 | . |
所以创建一个像上面的库就行了。
然后在运行下面命令
$ pod repo add artsy-specs git@github:artsy/Specs.git
此时如果成功的话进入到~/.cocoapods/repos目录下就可以看到artsy-specs这个目录了。至此第一步创建私有Spec Repo完成。
创建项目的podspec文件
把上面的那个的索引库(SepcReop) 建好了,那为您的仓库建一个podSepc文件。
最后把podSepc文件复制到SepcRepo这个库里面,那整个私有库就完成了。
1、创建一个podspec文件
1 | pod spec create your_pod_spec_name |
2、编辑库的信息
1 | # |
还是很简单的,按照上面的提示填完整上面的信息。
3、验证
可以在目录下使用下面的命令验证你的podspec文件是否正确,后面的--allow-warnings是允许警告的存在,你也可以去掉。
1 | pod lib lint --allow-warnings |
4、 本地测试
1 | pod 'Alamofire', :path => '~/Documents/Alamofire' |
如果podspec文件在库的根目录下,还可以
master分支
1 | pod 'Alamofire', :git => 'https://github.com/Alamofire/Alamofire.git' |
指定分支
1 | pod 'Alamofire', :git => 'https://github.com/Alamofire/Alamofire.git', :branch => 'dev' |
指定tag
1 | pod 'Alamofire', :git => 'https://github.com/Alamofire/Alamofire.git', :tag => '3.1.1' |
指定commint
1 | pod 'Alamofire', :git => 'https://github.com/Alamofire/Alamofire.git', :commit => '0f506b1c45' |
5、发布
只需要下面一句命令就会把你的库发布到私有的Spec中
1 | $ pod repo push REPO_NAME SPEC_NAME.podspec |
使用
在你的Podfile文件中添加下面命令导入私有的Specs库.
1 | source 'https://github.com/artsy/Specs.git' |
参考文章: